Monday, January 27, 2014

Munching on Micro-Greens


Got the winter can’t plant outside blues? Grow micro-greens inside – they take ten minutes to plant, ten days to grow and way less than ten minutes to harvest and eat.  The antioxidants are off the charts if you’re into juicing for improved health or just want some tasty little greens for salads, soup toppings or sandwiches for improved yum. The flavors are wonderfully intense and so, so fresh. They are a miniature essence of spring but with more crispness, pronouncement and kick. No kidding, growing micro-greens just may become your new best, favorite habit. You won’t give up your daily Jeopardy viewing, but you’ll find time to make sure your seed trays are watered and to see if it’s harvest time (ten days or less).  I used to tell myself that the hardest part to exercising was putting your shoes on, well…open a packet of seeds and you’re off sprinting to micro-green health fitness!

Micro-greens are the first seedlings of plants that are normally seeded outside and harvested when fully grown like lettuce, broccoli, basil, sunflowers, peas or custom seeds of mustards, cress and chard (and more).  You can purchase specific micro-green seeds from garden centers or mail order or use left over seeds from your cache.  One caution, parsnip seeds used for micro-greens are poisonous so use those seeds for planting outside to grow parsnips. 


'Savory Mix' on the left of 'Peas for Shoots'


A rinsed out lettuce container placed near a sunny window 

Ready to Harvest
Anyone can grow micro-greens, you don’t need to be a self-described gardener, and no excuses if you claim you can’t grow a thing, these seeds grow AND quickly! No need to buy fancy lighting equipment or heat pads either, just some kind of a dish or rinsed out plastic lettuce carton from the store works.  Use sterile potting soil, plant several seeds in the container, cover with a bit more soil, water, and then place near a sunny window or under grow lights. Check them often to make sure the soil doesn’t dry out and do not over water. Use scissors and cut them down to the top of the soil at the 1” to 2” height stage in roughly 7-10 days, rinse and enjoy. There’s no need to worry about damping off or diseases since you’ll be harvesting so often. Repeat this process for a continuous supply all winter, you’ll need to use fresh seeds each time but it's okay to re-use the soil unless disease sets in.   


Micro-Greens add crunch and color to any soup or stew


Monday, January 20, 2014

Take Cover - Winter Mulching, Part II


We all want a good outcome in the garden or at the hair dresser.  By good outcome I’m referring to healthy plants, pleasing blooms, and easy care.  For a good hair outcome you’re on your own. Last time I wrote about achieving a soft, workable vegetable bed by applying or renewing the area with a 4 to 6 inch thick layer of organic mulch with materials like leaves, straw or greenery left over from the holidays. Even pine needles work, or take the direct 
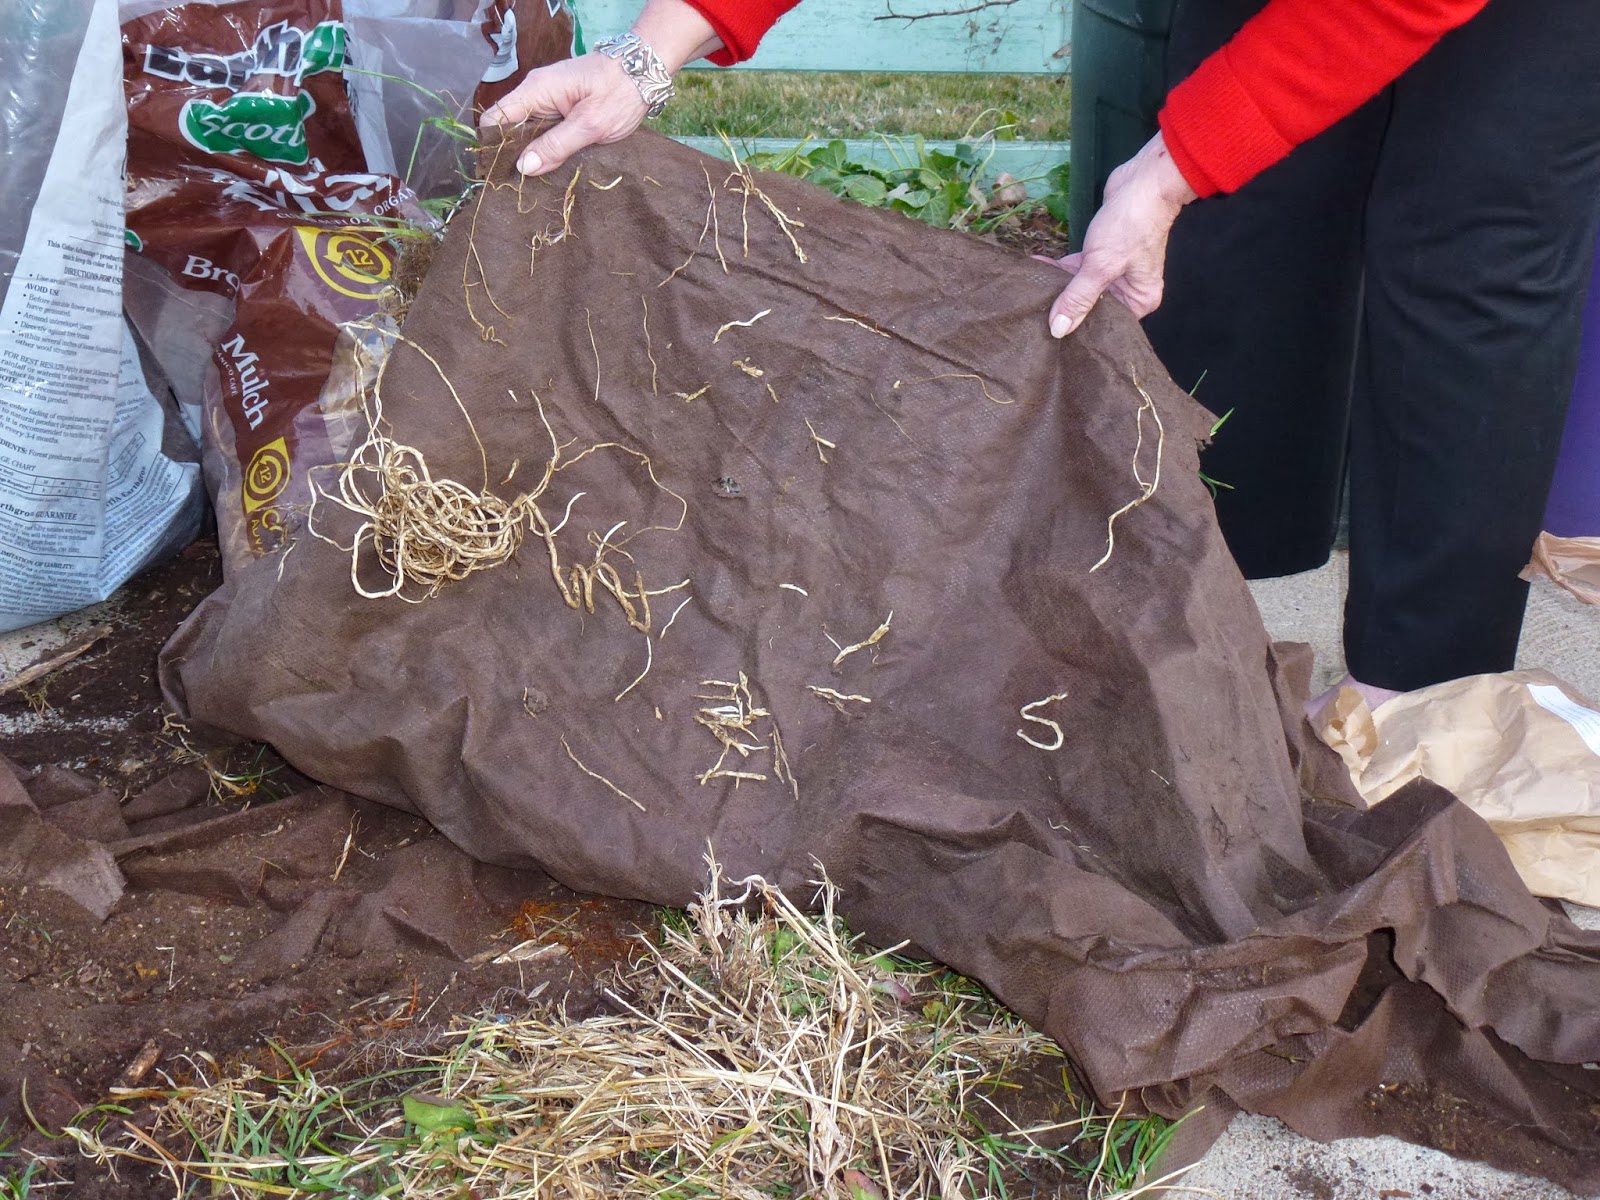
route if you’re out of leaves and purchase some untreated burlap from a garden center or hardware store and tack it down over your beds.  A blanket of mulch or burlap does wonders for your soil as it lays idle waiting for the spring wake up call to planting action.  The goal is to prevent the repetitive freeze/thaw cycle which makes the soil crack, dry out and just plain difficult to work in for sowing seeds and transplanting.  When you think about it, nature and forests mulch their own landscapes effortlessly with an ever present renewable supply of needles, leaves, plant roots and other materials creating organic layers that break down over time. You just need to pick up on nature’s template and begin or continue a mulch system in your neck of the woods.   


Bark Mulch in Winter

When and how landscape mulches will be used determines the best type to use. Winter mulch primarily keeps the soil evenly cool which prevents plants from heaving (rising up from their roots) which may lead to damaged roots or plant death.  This is especially important on new plantings.  The best time to apply winter mulch is after the ground has frozen in the fall. It is okay to renew the mulch through the winter months if it has blown away or is getting too thin.  

Add Mulch in the Fall after the Ground has Frozen

Mulch Protection on Fall Planted Roses

The same materials that can be used for vegetable beds can be used as winter mulch throughout the landscape – grass, leaves, straw or pine needles, apply to a depth of 4 to 6 inches.  Keep in mind that these types of mulches will break down quickly so will need regular renewal. Shredded wood and bark mulches are also excellent landscape mulch choices resulting in a uniform, finished appearance. Apply to a depth of 3 to 4 inches.  Keep all mulch materials at least 6 inches away from the base of woody plants to keep the bark dry. 

Keep Mulch Away from Trees to Keep the Bark Dry
  
Avoid using plastic mulches for permanent use throughout the landscape.  It doesn’t allow water, light and air to pass through to the soil and roots. Lack of oxygen and nutrients will negatively impact plant and root health.  But plastic can be used temporarily each spring to warm the soil in vegetable planting areas. Some vegetable gardeners keep the plastic in place and cut holes where they want to place warm season vegetables like tomatoes, peppers and squash. 

Warming the Soil with Plastic over Vegetable Bed

Use landscape fabric instead of plastic if weeds are a concern, but it’s not foolproof by any means.  I find that landscape fabrics are not an effective weed barrier in the long term. Weeds are crafty and opportunists.  Soil finds its way onto the fabric and weeds find another home on top of the fabric where their roots take anchor.  It’s much easier to pull weeds from a deep mulch layer than ones attached to fabric.  

Bindweed Roots Take Hold in Weed Fabric
 
Like winter mulch, summer mulch has several important functions for the ‘good garden outcome.’  Apply when soil temperatures begin to rise in late spring.  Mulch keeps soil temperatures cooler in the severe heat of summer and reduces soil evaporation so less water is needed. University studies found that summer soil temperatures are reduced anywhere from 8 to 13 degrees when compared to bare soil.  

Mulch improves the quality of the soil as it breaks down over time, along with preventing a hard crust build up that can result from water directly hitting and bouncing off the surface.

Keep in mind that when mulch decomposes there can be temporary nutrient losses to the plants, mainly nitrogen loss. Leaves that turn yellow are a sure sign of nitrogen deficiency so fertilizers are recommended - usually two pounds per 100 square feet. Be careful not to over mulch, especially with wood mulches. They can mat to the point of smothering young or shallow roots.  As mulch turns gray and weathers over time, instead of piling new mulch on each and every year, fluff it and turn it with a rake once or twice a year and only add new mulch every 2 to 3 years when it gets below the recommended 3-4 inch depth. 

There are other types of inorganic or inert mulch to consider using in your landscape.  Rocks, crushed stone, gravel and recycled rubber mulches are options for rock gardens, patios and pathways.  

Decorative Rocks Set off this Front Yard Perennial Bed


Keep mulch on your mind and in your landscape year round.  Used properly and to the correct depths your landscape outcome just might be nicer than your hair!


Sunday, January 12, 2014

Take Cover - Winter Mulching, Part I


Weather wise the month of January can tease a gardener to work outdoors.  There might be a day or more in a row where the temperatures are in the 50s and it feels so warm that we are tempted to reach for a shovel and turn over some soil.  We’ll do anything to feel needed by our garden, especially when it beckons us outside on a pleasant sunny day.  Patience is key, and just saying no is recommended for the anxious gardener.  In fact you might as well say out loud one hundred times that you will not dig too early or in soils that are too wet or too dry, because in a word, you’ll wreck the soil structure.  If you’re a four season gardener and using cold frames then you’re way ahead of many gardeners and have an excuse to work in the garden under the warmth of the frame. You’re probably out there harvesting cool season veggies right now, lucky you!

So what can we do outside this time of year besides rake blown in leaves or piles that are still around from the fall?  Well a couple of things…this is an excellent time to do some structural pruning on shrubs and trees; we’ll talk about that in a later blog.  The other good thing to do now is to renew your mulch, or add mulch for the first time on top of your vegetable beds. Mulch is defined as any material used to cover the surface of the soil. Previously living material that is decomposing is known as organic matter including fallen leaves, grass, straw and pine needles. The preferred mulch for winter use is organic matter versus inorganic products like plastic or weed fabric.  Mulch protects your beds through the winter, practically guaranteeing an easier preparation and planting process this spring.  


Snow works well as winter mulch

The old school method of turning over the soil each fall and leaving large clods to break down over the winter is not recommended as much anymore.  Most of the time the clods do not break down end up in a freeze/thaw pattern all winter. Snow is excellent winter mulch, but Front Range winters rarely provide a continuous snow covered blanket. Un-mulched soils crack, crust and dry out while the quality top soil blows away leading to erosion. Mulching the vegetable garden will protect your soil all winter and prevent the freeze/thaw cycle from making your soil surface look like fissures on an over baked pan of brownies. 

Dry, cracked, un-mulched winter soil, don't let this happen to you!

The worst part in trying to work and plant in un-mulched soil in the spring is that it feels like working in dirt, not friable soil. More like depleted, thin dirt, the kind you played kick ball on during recess.  First, round up some leaves (chopped is best), straw, Christmas greenery boughs, pine needles or untreated burlap. I keep extra bags of chopped leaves from fall raking to carry me through the winter, but if that’s not an option, check with garden centers or farm stores who may have some straw on hand. Burlap isn’t exactly mulch, but if organic materials like leaves and straw can’t be found then burlap will act as nice cover to prevent further erosion. Use landscape pins, bricks or boards to position the burlap over the beds.  Christmas boughs or pine needles work too, anything to protect your bare naked soil. Crisscross the boughs across the beds or carefully pile on layers of needles, wear gloves and long sleeves.  

Chopped leaves make an excellent winter mulch
Create a thick layer of mulch with your organic materials - 4 to 6 inches. Most likely your vegetable beds are frozen or nearly frozen, so adding mulch now probably won’t attract mice to nest under the mulch and hang out waiting for spring to arrive. If temperatures are over 45 degrees after mulching, drag out your hose and water the newly mulched area so it won’t blow away. Keep the mulched beds moist through the rest of the winter.  And water the rest of your landscape while you’re at it, especially if moisture has been scarce and wind conditions high.

Once the mulch is removed in the spring you will find a very workable soft bed of soil to plant.  Some years when I mulch early in the fall and keep it consistently renewed and thick, the spring soil is almost like butter and it's full of life with earthworms.  Life as a gardener just doesn't get better when it's this ready without much effort.

You can turn or till in the chopped leaves to add always welcome organic matter to the soil.  Wait a couple of weeks to plant so the materials have time to break down.  The pine needles and boughs can be added to the compost pile. Roll up, tie and store the burlap for another use down the road.  
  
Quality soil should have earthworm activity


Ready to Plant


Sunday, January 5, 2014

Happy New Year and New Blog!


How does a person begin a brand new garden blog, especially a person who isn't the most social media savvy? Well... I guess you just jump in with a trowel in your hand.  So be it, I have officially joined the countless cadre of people with passion who long to blog. I hereby promise to do my best blog imitation with regular posts and since I’m brand new, ‘regular’ seems so doable. And I will triple check my grammar and spelling for my family and anyone from my high school English class (and you too, the reader, thanks for reading this by the way). Since this is my first blog I’ll give you a brief biography, along with some winter garden container photos and information including Ferris Jem Cahill, our 3-year old soft-coated wheaten terrier.  He likes to be outside in the yard and garden so no doubt you’ll see him as we move along.  

Bio-
I’m a married ‘baby boomer’ living in central Denver. I’m named after my Aunt Betty, my dad’s sister, and my Aunt Jo, my mom’s sister. Put both together and you get Betty Jo, a pure southern handle, but I was born and raised in Montana. Most people call me Betty.  You don’t meet too many Bettys anymore, and it hasn’t been in the top ten baby girl names for several decades.  I’ve been gardening in Denver since ’88 when I moved from Billings, MT prior to living in Salt Lake City for two years. Gardening is probably in my DNA and my three siblings since they are avid gardeners too. I can trace it back to many generations on both sides of my family.  Of course gardening in the early to mid-1900s was primarily practiced out of necessity for food, and that is certainly the case with my grandparents. My parents gardened; my mom oversaw the vegetable plot (still does today at 89) while my dad arranged for yearly applications of nearly fresh steer manure top dressing for the lawn (he passed away in ’06).  He had a direct source from relatives who farmed and ranched in Raplje, MT, a tranquil, small farming community about 40 miles west of Billings. They still farm there today!

In the late 90s I got serious about vegetable and landscape gardening.  I took the Colorado Master Gardening course which ignited a strong desire to learn more about gardening in Denver and the inter-mountain West.  Through additional coursework, self-study and lots of in the garden practice I’m at a place where I know some stuff and I sure need to know more stuff about plants, vegetables, landscape practices and the latest insect and disease challenges that are arriving to our area. More about those in future blogs. A special shout out thank you goes to Ms. Susan Clotfelter from the Denver Post who found one of my garden ‘to do’ list class outlines and asked me to write a weekly garden punch list for the Denver Post seasonal Grow section.  That began in March of 2012 and continues today with my current first Saturday winter monthly Punch Lists.  Look for the weekly garden Punch List column to resume again in late March.     

Winter Containers-
Looking at empty outdoor containers after the growing season can be rather sad. Creating winter outdoor containers are a natural progression after completing your final fall garden chores and they are fun to do. They can be done any time after hard frosts and well into the winter months, even now after the holidays. I reward myself with doing the winter containers as the icing on the fall garden after finishing the other not so fun jobs like raking leaves out of the rocks surrounding the water feature.  And I think about what materials and design to use or reuse while doing those chores.  What is it about dreaming about how the garden or container should look that is almost as fun as doing the work?  Did Freud garden?  Maybe he had the answer?  

Here’s a recent photo of Ferris in front of our very simple outdoor containers on an iron frame made by Milton Croissant http://www.croissantcustom.com/.  Milton does an outstanding job of building custom wrought iron fences and he was the right person to ask to build us a couple of outdoor plant frames.  Not only do they set off the containers nicely but they allow water to easily drain, then I hose away any excess fertilizers during the growing season.  And yes, the lawn is pretty darn green in that hosed off area!


The three winter containers are by no means fancy or full of fine greenery and props. Two of the containers are remains from the summer so I chose to let them winter kill and enjoy the foliage all season long.  Some may comment that this is boring and so much more can be done to jazz them up. You’re right more can be done to add interest. Hopefully by sharing my photos and ideas you will get started on creating your own seasonal decorated containers.
  
These contemporary metal containers consist of a perennial smoke bush shrub (used as an annual last summer) along with the curly willow and spruce cuttings creating two tall accents.  The perennial blood grass (also planted last summer as an annual) round out the third container giving the trio a simple winter interest focal point in the yard.  Snow adds more depth and drama to any outdoor container, and hopefully you can enjoy the wintery view from inside your house or apartment.


Summer containers -  for the winter display curly willow and spruce cuttings replaced the coleus
Design-
Winter containers are a snap to put together, no worries about following the exact rules of using thrillers, fillers and spillers (although this rule works just as well for winter pots). Use the left over soil from the previous growing season to stabilize the collection you choose. Start with a bundle of tree branches or twigs and greenery to create easy and versatile brown and green combinations, and then add from there. Or you can buy collections of assorted greenery which usually include branches of juniper, cedar, boxwood, spruce and pine. Use anti-transpirant sprays like Wilt-Pruf to help them retain moisture. If you have access to red or yellow twig dogwood branches you’ll have instant color and attention. 

Add seasonal ornaments, fruit, vegetables (pomegranates, pumpkins), lighting or orange, red or white berry stems or flocked branches to give the container some pop. Fresh berry branches are available in garden centers, grocery stores or florist shops, but can be expensive, so consider buying some artificial berry branches at craft stores or places like Crate and Barrel or Pier 1 (they are on sale now, check their websites for deals). Use them from year to year until they wear out. When transitioning to late winter, take out the seasonal red accents and substitute spring blooming sprays of forsythia, quince or fruit trees.  And don’t forget the pinecones; they add the final outdoor touch to any container.
  
One note about the stability and longevity of using glazed or clay pots for winter containers.  Since they are porous, even with high-end glazed pots, there is no guarantee they won’t crack.  Some stores may sell them as winter hardy, but any freeze thaw cycle can or will cause expansion and contraction within the container, especially if soil is exposed and moisture easily gets inside.  So know this going in and opt to take the risk and replace cracked containers as needed or use ones that better withstand winter conditions such as concrete, stone, wood, fiberglass, cast iron and heavy duty metal containers.  If you decide not to winter decorate your porous containers move them to a garage or shed for the winter, or cover the top soil portion with cardboard, then cover and tie plastic tarps to keep out the moisture.  Use some kind of stand or layers of bubble wrap to elevate them from sitting directly on cold surfaces. 

For additional ideas for winter containers search on Pinterest or type in winter outdoor containers, then images.  You will see hundreds of examples and get more ideas that you can try. These two photos of containers were taken on a Christmas house tour a few years ago, both are lovely and worth recreating in your landscape.