Tuesday, March 2, 2021

Tool Time - Garden Tool Edition

In my book, the month of March in any year means the bulk of winter is in the rear view mirror.  Not that snow and cold events are over. We hope for plenty more snow and rain since we're behind in moisture totals. 

This is the month I take a good, hard look at my garden tools and then make decisions on new purchases or not ... ah heck, they're still good for another year or three. Out comes the soapy bucket, cleaning rags, sharpening tools, oil, and lastly, finding anyone in my family to high fist me for a job well done. 

I used to say back in the day when I had the will and a stronger back to regularly jog for health (they call it running now), that the hardest part is putting your shoes on. Once your shoes are on you can't easily change your mind. 

With garden tools, the hardest part in regular cleaning and maintenance is simply grabbing them from the hook or dusty shelf. If not given the attention they deserve, they'll sit or hang (uncleaned) until a hole needs digging or the roses pruned in late April. Then you'll be disappointed that you didn't care for them back in March when there was a foot of snow on the ground! No excuses, it is tool time.

First, why clean them? Just like washing our hands to remove germs and bacteria, we need to do the same for tools. No need to spread any harmful pathogens from last year to plants in the garden and new ones that will be planted soon. Remember, tools include plant trellises, cages and containers, they'll need a good washing and disinfecting too. Wait for a warm spring day when you can clean them outside.


Step 1. Clean and Disinfect

Pruners easily dissemble by removing the nut or screws that hold the blades together, the spring coil will slip off. Keep track of the pieces. Clean each tool well before disinfecting. Warm, liquid dish soap is all you need, use a stiff brush for hard to reach places. If there's dried on residue or sap, soak for a bit in soapy water or try Scrubbing Bubbles® which also disinfects. Lysol original or store brand version that is phenol-based also works well as a disinfectant. 

Avoid using diluted bleach products to disinfect pruners and other sharp edged tools. Bleach is very corrosive and can create nicks or pits to metal tools. 

Always rinse well after cleaning with water and dry with a clean cloth.

Rust can be removed a couple of ways. 

Soak exceptionally rusty tools in a jar or can of white vinegar for several hours or overnight. For shovels, soak a large rag with vinegar, wrap it around the shovel blade, cover with plastic and let it sit overnight. Use a wire brush after soaking to remove any residual rust. After soaking any tool, wash with soapy water, rinse and dry.

You can also try some elbow effort with sandpaper, steel wool or tried and true S.O.S. steel wool pads for rust. 

Step 2. Sharpening

Want a superior experience preparing a meal and maintaining a garden? I'm assuming your answer is yes ... both disciplines require sharp tools. Sure, it can seem like an intimidating task, but it doesn't have to be that way.

The easiest way to sharpen is to take your clean tools to a reputable garden center, hardware store, small business or family friend who specializes in sharpening gardening tools. For the sake of not leaving out anyone who offers this service, I won't list sharpening resources. Search online, network with garden friends and no doubt you'll find a good fit. Prices should be very reasonable.

For DIY, having a couple of sharpening tools will help tremendously. A carbide file is great for smaller tools like pruners, loppers and small snipper shears. A mill file works well on shovel blades.

Once all your tools are cleaned, disinfected and sharpened, give them a wipe down with some vegetable oil which will help prevent rust through the season. Bypass pruners will benefit from a drop or two of 3 in 1 oil to keep the mechanism lubricated.

photo from Pinterest
3. Tool Storage

I've read where gardeners brightly paint the handle of their trowel and leave it in a planting bed or someplace around the garden where it will be easily spotted. 

A pocketed apron is handy to hold and carry tools. 

They sell plastic tubs decked out with a saddle bag to hold all sorts of tools and maybe an adult beverage. 

Filling a bucket with sand or cat litter and oil then placing tools with the sharp side down is a handy idea too. They're kept clean and sharp for your use all season.

My tools are in a couple of places - a shelf in the garage for the quickest access and on hooks in the shed. Clean tools, sharpened pruners, life is good.

4. Resources 

How to Clean and Sharpen Tools

Clean and Disinfect Gardening Tools and Containers 

How to Properly Clean your Garden Tools & Pots  

The Myth of Cloroxed Clippers

Video - Laura, The Garden Answer How to Clean & Sharpen your Garden Tools 

Video - I talk tools with Alan Rollinger, Retired, Brilliant Landscape Designer 


My tools, all cleaned up, sharpened and oiled and ready to rock 'n garden!


Thursday, February 18, 2021

February Thoughts

Cornelian Cherry Dogwood Cornus mas blooms in March

19th century writer, poet and activist Victor Hugo truly understood the depth of failure and joy through the life of his main character―Jean Valjean in Les Misérable. 

Is his famous tale relatable to gardening? 

I think yes. 

Uncontrollable weather events like hail, drought, intense heat and extreme weather swings can surely represent the sorrow and loss associated with plant damage and loss. Conversely, the first bite into a juicy tomato, a sweet strawberry and the delightfully scented waft of lilacs in bloom epitomize the essence of agreeable summers. 

Hugo must have had a sense of what February means to many northern gardeners. 

Two of my favorite quotable quotes from him - 

"Winter is on my head, but eternal spring is in my heart; I breathe at this hour the fragrance of the lilacs, the violets, and the roses as at twenty years ago"

"Life is the flower for which love is the honey"

As of this writing dear gardener, the official date of the spring equinox is four weeks away.


Sunday, February 7, 2021

Grow your own Grocery Greens

I've written a couple of blogs about growing micro-greens indoors. It's a rewarding seeding experience for the run up to the outdoor planting season. 

The topic deserves a repeat, mainly because if I can do this successfully, then anyone can. This winter I've expanded the palette with lettuce seeds. I can't believe it took so long to try growing lettuce under lights, it's as easy as opening a seed packet.

First, the what-how-where -

Micro-greens are the first teeny, tiny seedlings of plants that are usually seeded outside and harvested when fully grown. They include lettuce, broccoli, basil, sunflowers, peas and seed mixes of cress, chard, mustard and many more. 

You can purchase specific micro-green labeled seeds from garden centers and online or use left over seeds from your cache. One caution - parsnip seeds used for micro-greens are poisonous so use them only for outside seeding and grow until they mature.

The taste of these little micro guys is so delish and fresh. In the blink of an eye, okay, mere days - they are ready for eating.

Use them on soup, pasta, sandwiches, eggs, vegetable and main dishes. Tossing them on your morning oatmeal might be a stretch, but not in the juicer.

The seeding how to takes about ten minutes, maybe less. 

  • Clean and rinse an empty plastic lettuce container (or any low container), poke some holes in the bottom if there aren't any drainage areas. 
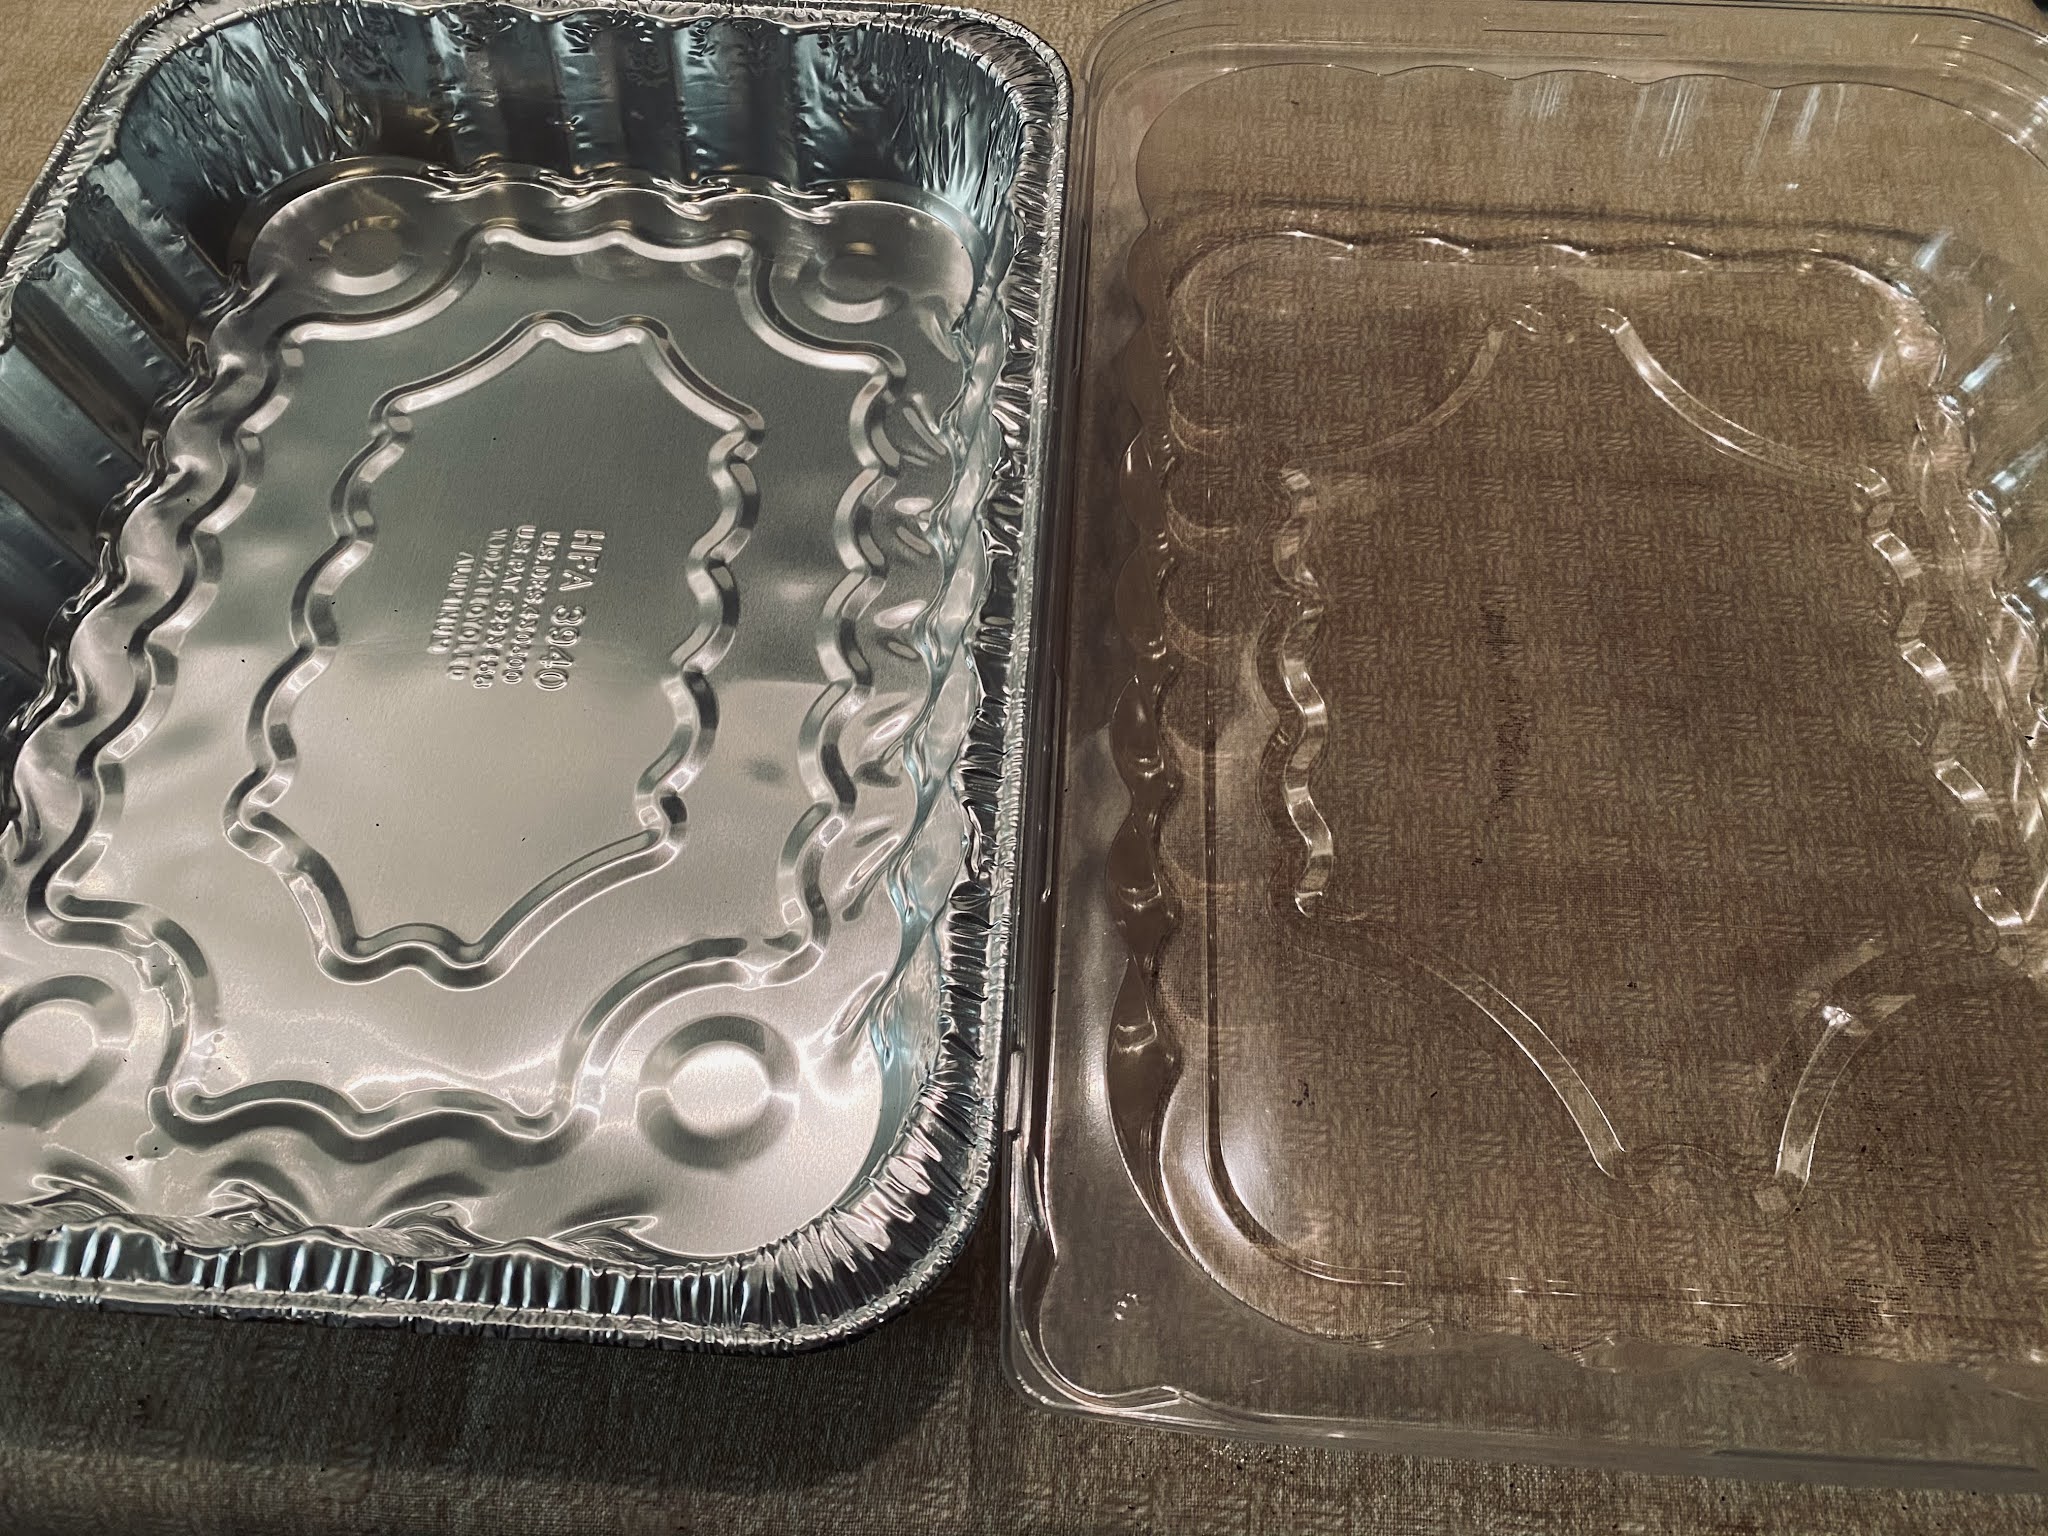
  • My new go to for a mass of micro greens is to grow them in recyclable large aluminum pans you buy at holidays when you need more pans or when you want to make a lasagna for a potluck or sick friend and leave it there.
  • Aluminum pans are inexpensive, cheaper than seed trays in most cases. Just use a Phillip's head screw driver or nail to poke holes in the bottom. Bonus, they are sold with their own plastic cover which works great as a dome over the tray until the seeds are up and moved under grow lights. 
  • Fill 3/4s with moistened sterile seed starting or a very light weight potting soil (not outside garden soil).  
  • Heavily sprinkle micro-green seeds or left over seeds over the soil, then add a very light layer of soil over the seeds. 
  • Water the seeded area well using a sprinkler type head instead of a regular pour type nozzle which can move the seeds and soil around too much.     


Place the tray with the plastic container over the pan near or under grow lights, the seeds will emerge either way. 

  • Use a heat seed mat if you wish, they will hasten seed emergence. Once the seeds are up (usually in 2-4 days), promptly remove the plastic cover and place near a very sunny window or under grow lights. 
  • Water when the soil looks slightly dry, usually every day for me - they can dry out quickly, keep any eye on them. 
  • In about seven to ten days you'll be harvesting fresh little micro-bursts of whatever seed you planted. 
  • To harvest, just cut a handful of greens right above the soil line, you don't even need to rinse them unless some soil is holding on.
  • I continue harvesting the batch until they are pretty spent (you'll know), the lettuce will provide several harvests and grow back quickly.

Three plastic containers of basil micro-greens staggered seeding. I used the plastic lid from an old seed tray for the larger basil seeding, works great too.

Close up of the basil micro greens and lettuce to the right

Time to cut the taller lettuce ... with tonight's lasagna!
 

Plan on seeding several batches and stagger them over the winter. Once harvested you can re-use the soil a few times (I do), unless gnats appear or disease is suspected. BTW, I continue growing basil as micro-greens outdoors in Smart Pot® containers, I seed in late May or June when temps are much warmer since basil doesn't like cold days and nights.


Monday, January 25, 2021

Compost in 2021

Gardening and composting are as simpatico as pairing basil and tomatoes. Just about every gardener I personally know has an outdoor compost set up. They are not difficult to configure as long as you have a little real estate. My Mom, a lifelong gardener was never particular about her compost system, a deep hole in the alley was all she needed to deposit grass clippings and fall leaves (she didn't compost food leftovers). I wrote about the basics of outdoor composting back in 2018, click here to read. 

With gardening all the rage these days, how do you compost if you live in an apartment or have limited space out your back door? Check out some of the newer, techy and less smelly ways for your scraps and yard waste to reach the rot stage. 

Photo from igreenspot.com

Tumbler Composters - not that new to the market and meant for outdoor use. Tumbling styled composters still need regular turning of the mass of heavy wet leaves and other materials with a garden fork to aerate. These systems simply require spinning the drum a couple of times a week which should ease your back and arm strain. Smaller sized drums would work on a balcony or patio. 

There are several companies, sizes and tumbler designs to choose from, or make your own -

Envirocycle

Family Handyman DIY  

FCMP Outdoor

Gardeners Supply 

KoolScapes Tumbler with Wheels for Moving

Mantis Composters

photo from geekextreme.com
Indoor Composting - technically in order to break down food waste into a finished organic material that can used in the garden, the equipment you'll need requires a bit of cash and electricity. 

These gizmos, using heat and agitation are high efficient microwave sized units that in approximately three to eight hours turn just about any food scraps (including meat and dairy) into a compost-like soil. My mind quickly imagines them working like a dishwasher (albeit much smaller), where you load it, turn it on, collapse into bed for eight hours after all that hard work (LOL) and wake up to clean dishes and fresh compost! Ain't life grand! 

In my quick online search I found limited availability on some models. 

BioCOMpet Home Pet Waste Reclycler - yes, it works on your pet's doodie too. 

FoodCycler by Vitamix

Smart Cara Food Waste Processor - this machine works a bit differently in that it takes water out of food then grinds it down, which can reduce food waste. You decide what to do with the outcome ... personally, I'd add it to the outdoor composter to finish the job.

Living Composter from Uncommon Goods 


Let Worms do the Work ... Indoors - worm assisted compost (also called vermicomposting) is simple enough for any six-year old who particularly likes red wigglers. The unit doesn't take up much room and in just a few weeks you'll have worm pooh gold! 

Homestead Essentials 

Living Composter from Uncommon Goods - pretty enough to keep on the kitchen counter (above photo)

Maze Worm Farms

VermiHut

Worm Factory Composters

Indoor Compost Collectors - you'll need a pail or container to carry kitchen left overs outside to your compost system. We've been using one with a carbon filter for years. It's holds almost 3 gallons of waste and fits next to our garbage can. There are several on the market. If you DIY with an old coffee can, be sure to empty often to avoid smells and indoor gnats.

Eco 2000 Kitchen Compost Collector

Gardeners Supply Indoor Compost Pails  

Compost Resources - 

Composting Structures

Composting Yard Waste

Worm Composting 


Friday, January 1, 2021

It's 2021 - Resolutions begin with Gardening

It's a New Year and you know what that means in the garden world, especially when gardening has become almost as popular as cerebral divertissement or more commonly known as streaming.

Digging in the dirt is not a passing trend, once it's under your fingernails you're hooked and you might even invest in a handy pair of garden gloves to keep them clean.

Lawn and Garden Retailer online writes that 86% of homeowners plan to continue gardening in 2021. This is great news, perhaps the end to "plant blindness" which was first coined in 1998 by two American botanists to describe how some people don't notice plants around them. That amazes me, the interesting photo says it all ... then again, it's a fun conversation piece for anyone walking by or visiting the homeowner. 

above photo from impatientgardener.com   


Please don't mind me adding these important gardening New Year's resolutions to your list. First, consider temporarily moving away from the giganto tv screen or your micro display on your techy smart watch. The Great British Baking Show and The Crown aren't going anywhere. Then pull out a blank piece of paper (or ten), pencil and a spare eraser. 

Sketch out skillfully or with your best stick figure rendering, your 2021 vegetable garden planting placement and list of must have plants. A full landscape plan like the one below helps tremendously with new landscape installations or periodic renovations. If you need a professional landscape company, get in their queue now, the good ones get booked early.

I've said this before and it bears repeating. Make your plan, then work your plan (thanks Dad, it was his mantra passed on to me). 


Why begin a plan in January instead of March? Because if you don't, count on long lines at area garden centers. I may be wrong, but everyone is saying (and you know how expert and reliable the "everyone" people are), this coming outdoor garden season will be a banner sales year on steroids. 

Indoor plants are sold year round. You'll have to wait until spring to purchase outdoor plants when they become available for sale at local retailers. Online companies will gladly take plant orders now for later shipping when it's time to plant in our area. In addition to drawing this year's garden plan, this month is perfect timing to shop for seeds at garden centers and online. Also stock up on indoor seeding supplies and any other garden tools you may need. 

Below are some linked resources which may assist you in your planning and plant choices. Also check out your favorite garden centers, CSU Extension Offices, and botanic gardens to see what garden classes they are offering this year. Many are free or offer affordable fees. No doubt they will be online while we're still in safe mode until we're free to move about the world.

From This Blog -

Seeding Indoors and Out, What to Plant and When

Learn at Home Gardening Series - a handful of PowerPoints I've taught to the public on popular gardening topics and plants

Seeding and Planting Charts - Includes ornamental annuals, cool season vegetables, warm season vegetables, and herbs

Indoor Seeding

Colorado State University Horticulture -

2020 Best of Annuals at the CSU Trial Garden - these selections should be available in area garden centers in the spring of 2021. 

2020 Best of Cool Season at the CSU Trial Garden - these selections should be available in area garden centers in the spring of 2021. 

2020 Top Performer Perennial at the CSU Trial Garden - these selections should be available in area garden centers in the spring of 2021. 

2021 Plant Select® Plants

Landscape Design - Colorado State University, many topics to choose from.

Vegetables and Herbs - Colorado State University, many to choose from.

Small Fruit - Colorado State University, many fruits to choose from.

Tree Fruit - Colorado State University, many trees to choose from.

Other Reputable Online Resources (I don't personally recommend specific seed or plant companies, just too many out there)

New Plants for 2021

New Plants for a New Year

All American Selections (Plants) for 2021

Preparing for your 2021 Garden from Utah State Extension (very similar growing conditions to Denver Metro).